Render modes and RCL
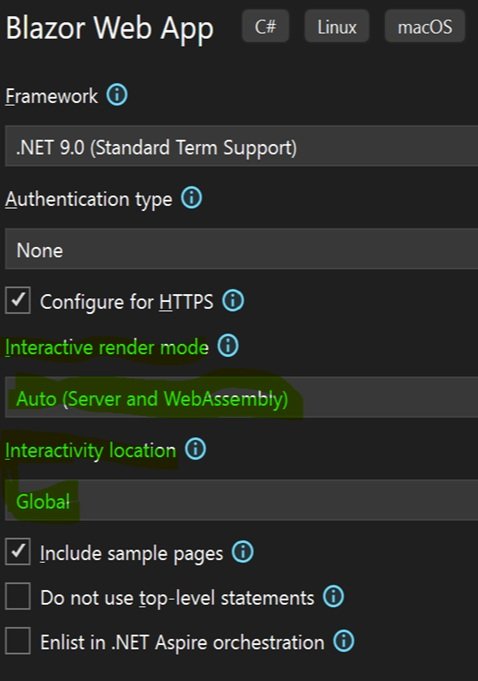
In Visual Studio and Dot Net 9, Blazor Webapps are created with the Blazor Web App template. The template has two parameters you need to understand.
· Interactive render mode
· Interactive location
We will create Blazor projects in a solution named BlazorWorkbench. We will use it to create and test Blazor components. We name each Blazor project in a way to identify which options were used to create it. I recommend you do this for all of your Blazor projects.
Each project will contain the same sample Weather app. In lesson 2 we will create a Razor Class Library (RCL) and copy the Weather app to it. Then delete the Weather app components from the Blazor projects and configure the projects to run the app from the RCL.
Blazor Web App Template
Create WebApp Projects
All projects in this lesson use the Global location.
Create a new Blazor Web App project in a new solution named BlazorWorkbench. Name the project BlazorWorkbench.AutoG. Interactive mode is Auto and interactive location is global.
The template created two projects in the solution. These two projects will be combined into a single package for deployment. The server project contains items used by the server and the client project contains items that the server will send to the client.
Add a project named BlazorWorkbench.WasmG to the same solution. Interactive mode is WebAssembly and interactive location is global.
Once again two projects are created one for the server and one for client.
Add a project named BlazorWorkbench.ServerG to the same solution. Interactive mode is server and interactive location is global.
Only one project is added to the solution as all the code will be executed on the server.

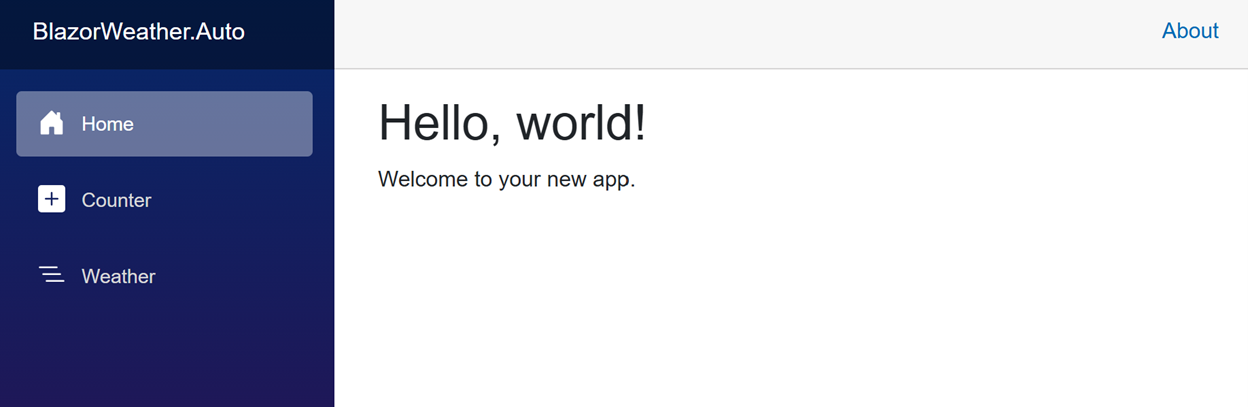
When you run each app, you will see the same pages. The same actions, menu etc. If you look at the source code you will see they are all the same. This is why we can place the pages and the code into an RCL, reconfigure the apps to use the RCL and get the same results.
The WasmG project downloads all of the code to the client. But this means it will take some time for the app to download and start. The first time a user runs the app will be longer than the second time, because the app is cached.
The ServerG project will run your code on the server and the client will make remote calls to the server. A small portion of the overall Blazor Framework will be downloaded to the client. The page contains components that can be added, deleted or changed, there by changing the screen without downloading a whole page. The client makes remote calls to the server to execute code and the server returns with updates to the page.
The AutoG project can run both modes. It is called Auto mode because the app can start in server mode and as the code is downloaded it will switch to web assembly mode.
Standalone
In addition to the Blazor Webapp template, Visual Studio has a Blazor Standalone template to create standalone desktop apps with a Blazor UI. It has a Progressive option. If you create a progressive project the app will be able to access the resources of the computer system just like any other window app. If you do not select progressive, it will be constrained like it is in a web browser.
Create a fourth project with the template using the progressive option named BlazorWorkbench.Pwa.
What about Maui?
You may have heard about Maui. This allows you to create a Blazor Phone app for Android or IPhone. You can also create a Window desktop with Maui, but it will add additional complexity because you are adding things used to create phone apps to your development environment. For a Window desktop app use the Standalone template.